


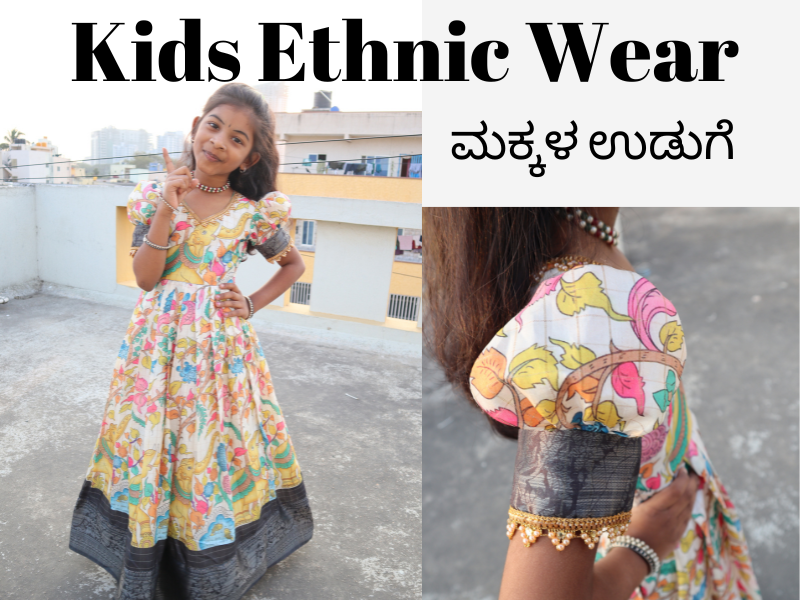
Sewing a little party dress for a child is one of the most joyful things you can make. It is small, it comes together quickly, and the smile on the child's face at the end is worth every stitch. If you have never sewn before, please do not worry. In this guide we will draft (that means draw the pattern shapes on paper) and plan a simple ethnic party dress for a young child, step by step, in plain and friendly language.
What Is a Simple Ethnic Party Dress?
For our project, think of a sweet frock with a fitted top and a gathered skirt. The top part that covers the chest and back is called the bodice (say it "bod-iss"). The lower part that flares out is the skirt. When we sew soft folds into the skirt so it puffs out nicely, that is called gathering. This shape suits ethnic party wear beautifully, and it looks lovely in cotton silk, soft brocade, or a printed festive fabric.
Tools You Will Need
You do not need a fancy studio. A few simple things are enough to begin.
Measuring tape – the soft flexible kind, to measure the child's body.
Paper – old newspaper or brown paper is perfect for drawing your pattern.
Pencil, ruler, and a pair of scissors – one scissor for paper and, if possible, a separate one only for fabric.
Pins – to hold fabric layers together.
Fabric, matching thread, and a zip or a few buttons for the back opening.
Step 1: Take the Child's Measurements
Good measurements are the secret to a dress that fits. Ask the child to stand straight and stay still for a moment. Measure gently, keeping the tape snug but not tight.
Chest – wrap the tape around the fullest part of the chest.
Waist – measure around the natural waist, roughly where they bend at the side.
Shoulder to waist – from the top of the shoulder down to the waist. This is the length of the bodice.
Waist to knee – from the waist down to wherever you want the dress to end. This is the skirt length.
Shoulder width – across the back, from one shoulder point to the other.
Write every number down on paper right away. It is very easy to forget them.
Step 2: Add Ease and Seam Allowance
Two small words will save your dress. The first is ease, which means a little extra room added to the body measurement so the child can move, breathe, and play comfortably. For a child's bodice, adding about 2 to 3 cm of ease around the chest is plenty.
The second is seam allowance, which is the extra strip of fabric beyond your stitching line so the seam does not fray or pull apart. Add about 1.5 cm all around every pattern piece. When you draft on paper, draw your real shape first, then draw a second line 1.5 cm outside it and cut along the outer line.
Step 3: Draft the Bodice
The bodice is just a simple shape. You will draft the front and the back separately, because the front dips a little lower at the neck than the back.
On your paper, draw a rectangle. Its width is one quarter of the chest measurement plus ease, and its height is the shoulder-to-waist length.
At the top corner near the fold, mark the neckline (the curved opening for the head). Draw a gentle curve – scoop it deeper on the front piece, shallower on the back.
From the shoulder, draw the armhole, which is the curved cut-out where the arm goes through. Curve it softly inward and down toward the underarm.
Cut two front pieces and two back pieces if your fabric is not folded, or place the pattern on folded fabric to cut mirrored halves at once.
Keep the curves gentle and smooth. Children's clothes are small, so a soft, rounded shape looks neat and is easy to sew.
Step 4: Draft the Gathered Skirt
The skirt is the easy, fun part. It is simply a wide rectangle that we will gather into folds.
For the width, take the child's waist measurement and multiply it by 2. This extra width becomes the pretty gathers.
For the height, use your waist-to-knee length, and add a little for the hem (the folded-under bottom edge).
Cut one rectangle for the front skirt and one for the back skirt.
Step 5: Sew It Together
Now the pieces become a dress. Take your time and press each seam flat with an iron as you go – pressing is what makes home sewing look professional.
Join the front and back bodice pieces at the shoulders and the side seams, right sides of the fabric facing each other.
Run two rows of long loose stitches along the top edge of each skirt piece, then gently pull the threads to form even gathers until the skirt width matches the bodice waist.
Pin the gathered skirt to the bottom of the bodice and sew them together.
Leave a small opening at the centre back and add a zip or a few buttons so the dress slips on easily.
Fold and stitch the hem, finish the neckline and armholes neatly, and press the whole dress.
Common Mistakes to Avoid
Skipping ease. A dress cut exactly to body size will feel tight. Always add that little extra.
Uneven gathers. Pull both gathering threads slowly and spread the folds evenly before stitching.
Forgetting seam allowance. If you cut on your exact line, the finished dress ends up too small.
Rushing the pressing. A quick iron after each seam makes a huge difference.
Learn With Guidance at By Bhavani
Reading is a wonderful start, but nothing beats a patient teacher beside you the first few times. Our Kids Ethnic Wear Dress course walks you through cutting and stitching festive children's outfits from the very beginning, with clear demonstrations you can follow at your own pace. Classes are taught mainly in Kannada, both online and offline, so you can learn from home in Bangalore or anywhere else.
If you would like to see everything we offer, from blouses to boutique training, browse our full list of courses and pick what excites you most.
Ready to Start Stitching?
You truly can make a beautiful little party dress, even as a complete beginner. Start with one simple frock, be kind to yourself while learning, and enjoy the process. When you are ready for friendly, hands-on guidance, we would love to teach you.
Enroll today or ask us anything on WhatsApp: +91 70900 27905. Bhavani Durga and the By Bhavani team in Vidyaranyapura, Bangalore, are here to help you begin.